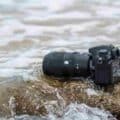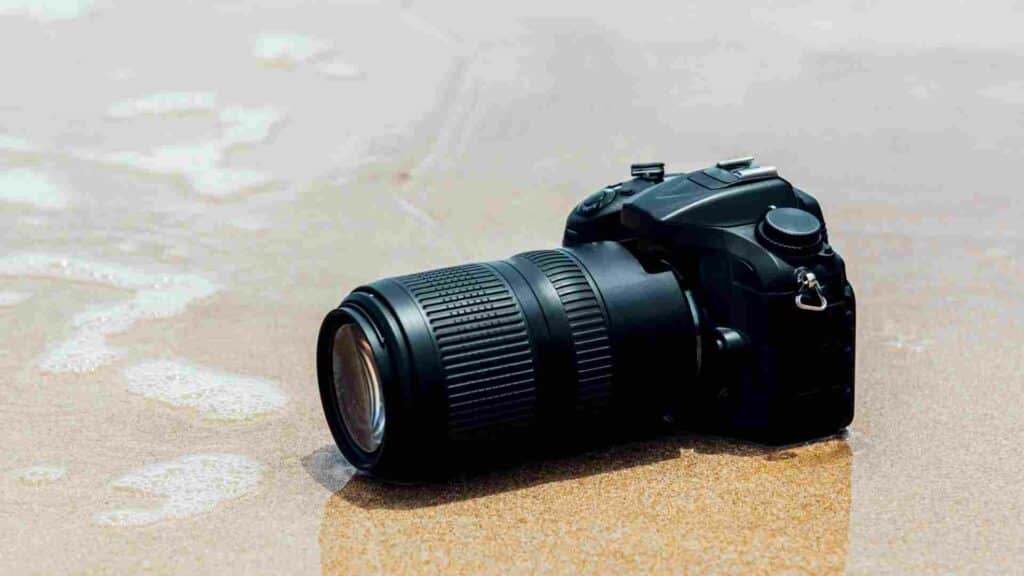
It’s a familiar story. You were out in the enchanting mist of the morning, passionate about capturing the best of your favourite subject. Then, almost instantly, it began: the dreaded rainfall. Fear invaded you as you panicked and rushed away, not daring to drop your valuable camera. But what will this unfortunate incident lead to? Will your gear be ruined, or could you salvage it before it is too late? Don’t worry — with these steps right behind you, everything may work in your favour, and those lovely shots may still stand a chance!
Shut off the Camera Immediately and Remove Batteries/Memory Cards
Assuming you end up in a circumstance where your DSLR camera gets wet, the main thing you want to do is act rapidly. The primary step is to shut down the camera quickly. This will forestall any shortcircuiting that could, for all time, harm your gadget. Remove the memory cards and batteries as the next step. If you want to see if your camera is still working, resist the urge to turn it on.
Remember that dampness and power don’t remain forever inseparable, so it’s ideal to decide on watchfulness and eliminate any wellsprings of capacity to your camera. Whenever you’ve followed these two stages, now is the perfect time to evaluate the harm and decide what to do straight away. Recall that time is critical, so make sure to move quickly and save your dearest DSLR from water harm.
Carefully Remove Any Remaining Moisture with a Dry, Soft Cloth
Whenever you’ve decided to eliminate the battery and memory card from your wet DSLR, now is the right time to continue toward the following significant stage – cautiously eliminating any leftover dampness. You ought to find a dry, delicate fabric or towel that won’t abandon any build-up or particles. Delicately wipe down the outside of the camera, taking into consideration not to apply a lot of tension or rub too overwhelmingly.
If there are any difficult-to-arrive-at regions or where dampness has gathered, utilize a Q-tip or toothbrush to ingest the water delicately. It’s significant to take things slow and be as delicate as conceivable at this stage to avoid additional harm or consumption. While it could be enticing to turn on the camera and check, assuming it’s working appropriately, it’s ideal to hold on until you’ve finished every one of the vital stages to guarantee that you are hurt.
Place the Camera in an Environment with Low Humidity and Temperature
When your DSLR camera is exposed to water, the first important step is to remove the battery and memory card immediately. Now, place it in a low-humidity, low-temperature environment. The justification is that the low temperature will diminish the gamble of any further harm or consumption to the camera’s interior parts. In contrast, low stickiness will ensure that no dampness is left in the camera.
You can utilize a silica gel or water/airproof sacks containing rice to ingest any overabundance of dampness from the camera. Sunlight can damage your camera even more, so keep it out of the sun. Recall that hurrying can inflict damage, so be patient and allow the climate to go about its business. Following these steps might give your wet camera a chance to work again.
Use a Vacuum to Remove All Water Particles from Inside the Camera Gently
When dropping your DSLR camera in water, for example, a pool or lake, it very well might be enticing to frenzy and promptly throw it in the garbage. Nevertheless, there are actions you can take to save your camera possibly. The fourth step is to utilize a vacuum to delicately eliminate all water particles from inside the camera. This might appear outlandish, as vacuums are commonly connected with tidying up soil and garbage.
However, the suction of the vacuum can assist in removing any remaining water that may be entrapped within the camera. It is urgent to be delicate while utilizing the vacuum to avoid further harming the camera’s fragile parts. This step is particularly significant since supposing any dampness remains could further damage the camera’s inside functions and result in hopeless harm.
Take the Camera Apart for Further Inspection and Cleaning
You can do a few things to try to save your DSLR camera if it gets wet. After vacuuming, the fifth step is to disassemble the camera for further cleaning and inspection. This step should be endeavoured by somebody who understands what they are doing – a specialist, similar to a cell expert. They can take apart the camera and determine how much damage was caused by water. Any eroded parts should be supplanted, and the camera will require careful cleaning to forestall further harm. Moving quickly when your camera gets wet is critical, as any deferral can demolish the damage. However, if you go with a knowledgeable guide, your DSLR might be able to recover from a water accident.
Allow Time for the Parts to Fully Dry Out Before Putting it Back Together Again
Although it may be enticing to promptly attempt to assemble your DSLR back after it’s been wet, it’s essential to permit time for its parts to dry out first wholly. If water cannot evaporate completely, it can quickly enter the camera’s internal components and cause severe damage.
In addition, attempting to fit the components together before they are dry could result in rust or a short circuit. Therefore, if you accidentally submerge your DSLR, resist the urge to reposition everything. All things considered, let it hang out in a warm, dry spot for about 24 hours to guarantee that each drop of water has vanished. Your camera will thank you for it!
Final Words
Well, that’s all there is to it! Your DSLR should now be safe and sound and ready for action. Though you may have been panicking before, don’t let a camera accident stop you from continuing your photography journey. You can get back up on your feet in no time! Just make sure to contact us if you ever find yourself in a similar situation again – we’ll help you on your quest for perfectly captured memories! You can trust that we know exactly what to do. Keep those pictures coming — water-free!
Related posts: