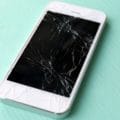
You can replace the battery on an iPhone 13 Pro Max by following this guide. Please take the appropriate precautions if your battery is swollen. It is also important to note that your iPhone may display a warning about the “genuineness” of the battery after the repair, even if you have used original Apple parts. In this case, you can ignore the warning if your iPhone is functioning normally.
The best way to get the most out of your newly installed battery is to calibrate it after completing this guide: Charge it to 100% and keep charging it for at least two more hours. Then, make sure your iPhone is charged completely. Afterwards, use your iPhone until it shuts down as it runs out of power.
Some necessary tools you would need to start this replacement guide:
- P2 Pentalobe Screwdriver iPhone
- Heating pad
- Phillips #00 Screwdriver
- Opening Picks (Set of 6)
- Suction Handle
- Tri-point Y000 Screwdriver
- Spudger
- Tweezers
- Isopropyl Alcohol
- Safe Tweezers Blunt Nose
Optional Tools
- Packing Tape
- Safety Glasses
- Coffee Filters or a lint-free cloth
Step 1 Remove the pentalobe screws
- We recommend that you discharge your iPhone’s battery below 25% before you begin. If a lithium-ion battery that has been charged is accidentally punctured, it may cause a fire or even explode.
- Make sure the device is unplugged before disassembling it.
- Two 6.8 mm-long pentalobe P2 screws are located at the bottom edge of the iPhone.
- If you remove these screws, you will breach the waterproof seals of the iPhone. Ensure you have replacement seals ready before moving on to the next step or take precautions to ensure you do not expose the iPhone to liquid if you decide not to replace the seals.
Step 2 Tape over any cracks
- Tape over the cracked screen of your iPhone if it has a cracked screen to keep further damage contained and prevent personal injury during the repair.
- You want to cover the iPhone’s whole display with overlapping strips of tape so that the entire screen is covered with tape.
- Glass shards will be kept contained this way, and structural integrity will be provided when prying or lifting the display.
- Protect your eyes from any glass thrown loosely during work by wearing safety glasses.
- If you have trouble getting the suction cup to stick in the next few steps because of the broken glass, you can try folding a piece of strong tape (such as duct tape) into a handle and then lifting the display instead.
Step 3 Heat the lower edge of your iPhone
- To open the iPhone, it is a good idea to warm the lower edge of the phone to soften the adhesive that holds the screen in place.
- You can soften up the adhesive underneath the iPhone by using either a hairdryer or heat gun or by preparing an iOpener and applying it to the lower edge for a few minutes.
Step 4 Apply suction cup(s)
- Our next two steps will demonstrate how we can use the suction cups, which are useful for anyone who performs repairs regularly.
- You should remove the plastic depth gauge attached at the center of the suction cups if it’s there-it’s not needed for a larger iPhone such as the iPhone 13 Pro Max.
- Using suction cups, place one on the front and one on the back of your iPhone. Place the suction cups near the bottom edge of your iPhone.
- Firmly press both of the suction cups into the bottom edge of your iPhone.
- Depending on the severity of the crack, you may need to cover the display glass with a layer of clear packing tape to help the suction cups stick.
- To separate the screen from the phone case, hold onto your iPhone firmly and close the handle of the suction cups to a slight degree.
- Please don’t try to separate the screen – only a small opening along the bottom edge will do.
- On the bottom edge of your iPhone, near the screen, place an opening pick in the gap between the screen and the lower edge.
Step 5 Heat and separate the screen adhesive
- To soften up the adhesive underneath the iPhone, you can use a hairdryer or heat gun or prepare a heating pad and apply it for about a minute to the left edge of the iPhone.
- By sliding the opening pick around the lower-left corner of the iPhone and up along the left edge, you will be able to slice through the adhesive holding the display in place.
- Ensure that you don’t insert the pick farther inside your phone than 3 mm, or else you may damage the display cables inside your phone.
- If necessary, use a hairdryer or heat gun or prepare a heating pad and place it on the right edge of the iPhone for about a minute to soften up the adhesive underneath.
- Continue to pull the adhesive off the right side of the iPhone by re-inserting the pick at the bottom edge and sliding it up the right side to continue separating the adhesive.
- You should not insert the opening pick farther than 3 millimetres into the iPhone, or you may cause damage to the internal components.
Step 6 Open the iPhone
- Take the suction handle off the screen of the iPhone.
- The display of your iPhone can be opened by swinging it up from the right side, just like you would open a book.
- Please do not attempt to fully separate the display from the iPhone’s logic board for the time being, as several fragile ribbon cables are still attached to it.
- Keep the display propped up against something to stay upright as you’re working on the phone.
- If you would like to reassemble the display, lay it in position, and align the clips along the top edge. Then carefully press the top edge before snapping the rest of the display. If it doesn’t click, make sure the clips around the perimeter of the display are not bent, and if not, replace them and make sure they aren’t bent.
Step 7 Remove the battery connector cover
- Removing the three 1.3 mm screws and securing the battery connector cover with a Y000 screwdriver is necessary.
- To avoid damaging your iPhone, keep track of each screw throughout the repair and ensure it is placed back exactly where it came from to avoid damaging it.
- It is a good time to power on your iPhone during the reassembly process and test all the functions before sealing the display. Before continuing the process, make sure you turn your iPhone off completely.
- Now you will need to remove the cover of the battery connector.
Step 8 Disconnect the battery
- To remove the battery connector from the logic board, use a clean fingernail or the pointed end of a spudger.
- Do not damage the black silicone seal surrounding this connection. It provides additional protection against water and dust intrusion.
- During repair, bend the connector slightly away from the logic board so that it does not accidentally make contact with the socket and provide power to the phone.
Step 9 Disconnect the display cable
- The display connector needs to be pried up from its socket on the logic board with a spudger or fingernail that has a pointed end.
- Press connectors can be re-attached by carefully aligning them and pressing them down on one side. Until it clicks into place, repeat the process on the opposite side. Please refrain from pressing down in the middle. The pins on the connector can bend if it is misaligned, causing permanent damage to the device.
Step 10 Unscrew the front sensor connector cover
- You must remove the front sensor connector cover with a Y000 screwdriver by removing two 1.1 mm screws.
- For the remaining two screws located on the front sensor connector cover, use a Phillips screwdriver to remove them:
- There is one 1.5 mm screw on the front sensor connector cover.
- And 1.8 mm screw on the back of the sensor connector cover.
- Take off the sensor connector cover on the front.
- For you to disconnect the front sensor assembly cable connector, you will need to use the pointed end of a spudger.
- Unplug the display assembly from the connector.
- If you want to replace the waterproof adhesive around the edges of the display during the reassembly process, you need to pause here.
Step 11 Unscrew the loudspeaker
- Using a Phillips screwdriver, remove the four 1.5 mm screws holding the loudspeaker in place:
- There are two screws with larger heads.
- Two screws with smaller heads
Step 12 Separate the loudspeaker adhesive
- Using an opening pick, slide it between the top edge of the taptic engine and the adhesive-backed strip.
- You can now remove the loudspeaker.
Step 13 Remove the Taptic Engine
- It is necessary to pry up the Taptic Engine cable with the pointed end of a spudger to disconnect it.
- It is necessary to remove two screws securing the Taptic Engine using a Phillips screwdriver:
- The first is a 1.8 mm screw
- The second is a 1.9 mm screw
- You will need to remove the 2.9 mm standoff screw that secures the Taptic Engine with a standoff screwdriver.
- You can then remove the Taptic Engine.
Step 14 Locate the adhesive pull-tabs
- A stretch-release adhesive is used to secure the battery to the rear case in four places: two on the bottom edge of the battery and two on the top edge.
- There is a black pull-tab at the end of each adhesive strip, which is lightly affixed to the edge of the battery.
- We will pull each tab one by one to slowly stretch out the adhesive underneath the battery as we move along. The adhesives used in these “command-strip” styles lose their stick when stretched so that you can take out the battery with no problem.
- Do not panic if you break one of the strips! They may not always work as they were intended. The tips below will help you remove the broken strip.
- Take hold of the first pull-tab with your fingers or the center of a spudger and slowly pull it away from the battery towards the bottom of the iPhone.
- Make sure you pull hard enough to maintain tension on the strip but not so hard that it breaks. Make sure it has plenty of time to stretch and unstick itself from beneath the battery.
- Make sure you do not press down on the battery. Be sure to hold the iPhone firmly by the sides so that you do not damage the battery.
- Make sure that the strip is flat and does not wrinkle. If you are pulling the strip evenly, on the whole, you will probably get a better result instead of just in the middle or on one side.
- Take care not to snag the strip on the edge of the battery by pulling it at a low angle.
- It would help if you tried to retrieve the adhesive strip if it broke off. If this happens, use your fingers or blunt tweezers to find it, and then pull it. Be careful not to pry under the battery.
- Occasionally, some adhesive strips under the battery can break off and cannot be retrieved. Try removing the rest of the strips first, and proceed as instructed below.
Step 15 Remove the battery of iPhone 13 pro max
- Remove the battery from the device.
- If there is any alcohol solution left in your phone, wipe it off carefully with a coffee filter, or you can allow it to air dry before installing your replacement battery.
- Refer this guide to your friends for help replacing the adhesive strips if your new iPhone battery didn’t come with adhesive already installed.
- After reassembly, you should force restart your device. You can prevent several issues and simplify the troubleshooting process by doing so.
Conclusion
It may be necessary to transfer the remaining components or remove adhesive backings from your new replacement part before installing it. Compare the new part to the original part.
You will need to reverse the above steps to reassemble your device. If you think this replacement guide is not very easy try to find a cell phone repair shop near you. Technicians working in these shops have ample experience.
If you have any questions regarding this repair guide you can contact us and we would be there to help you.
Related posts: